
How to configure email settings
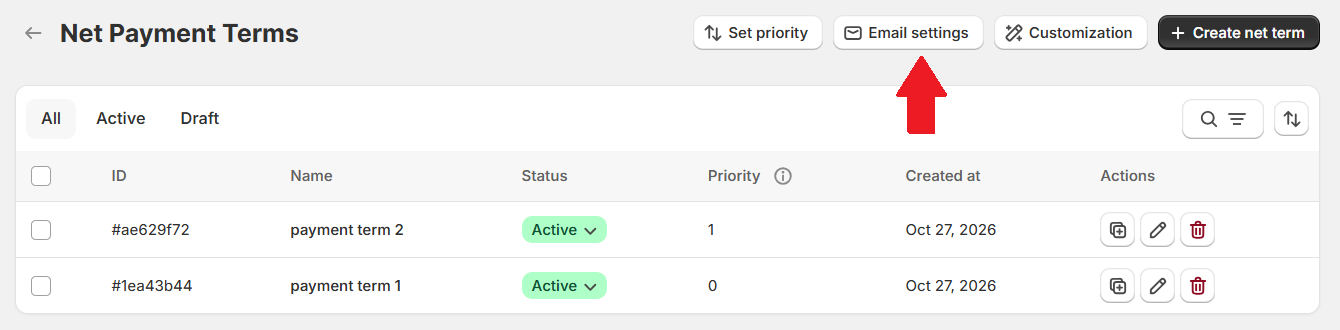
Choose net payment term notifications, edit their email content, and save your templates.
1. Open Email settings
Go to Order Management Net Payment Terms, then select Email settings above the rules list.
2. Choose a notification
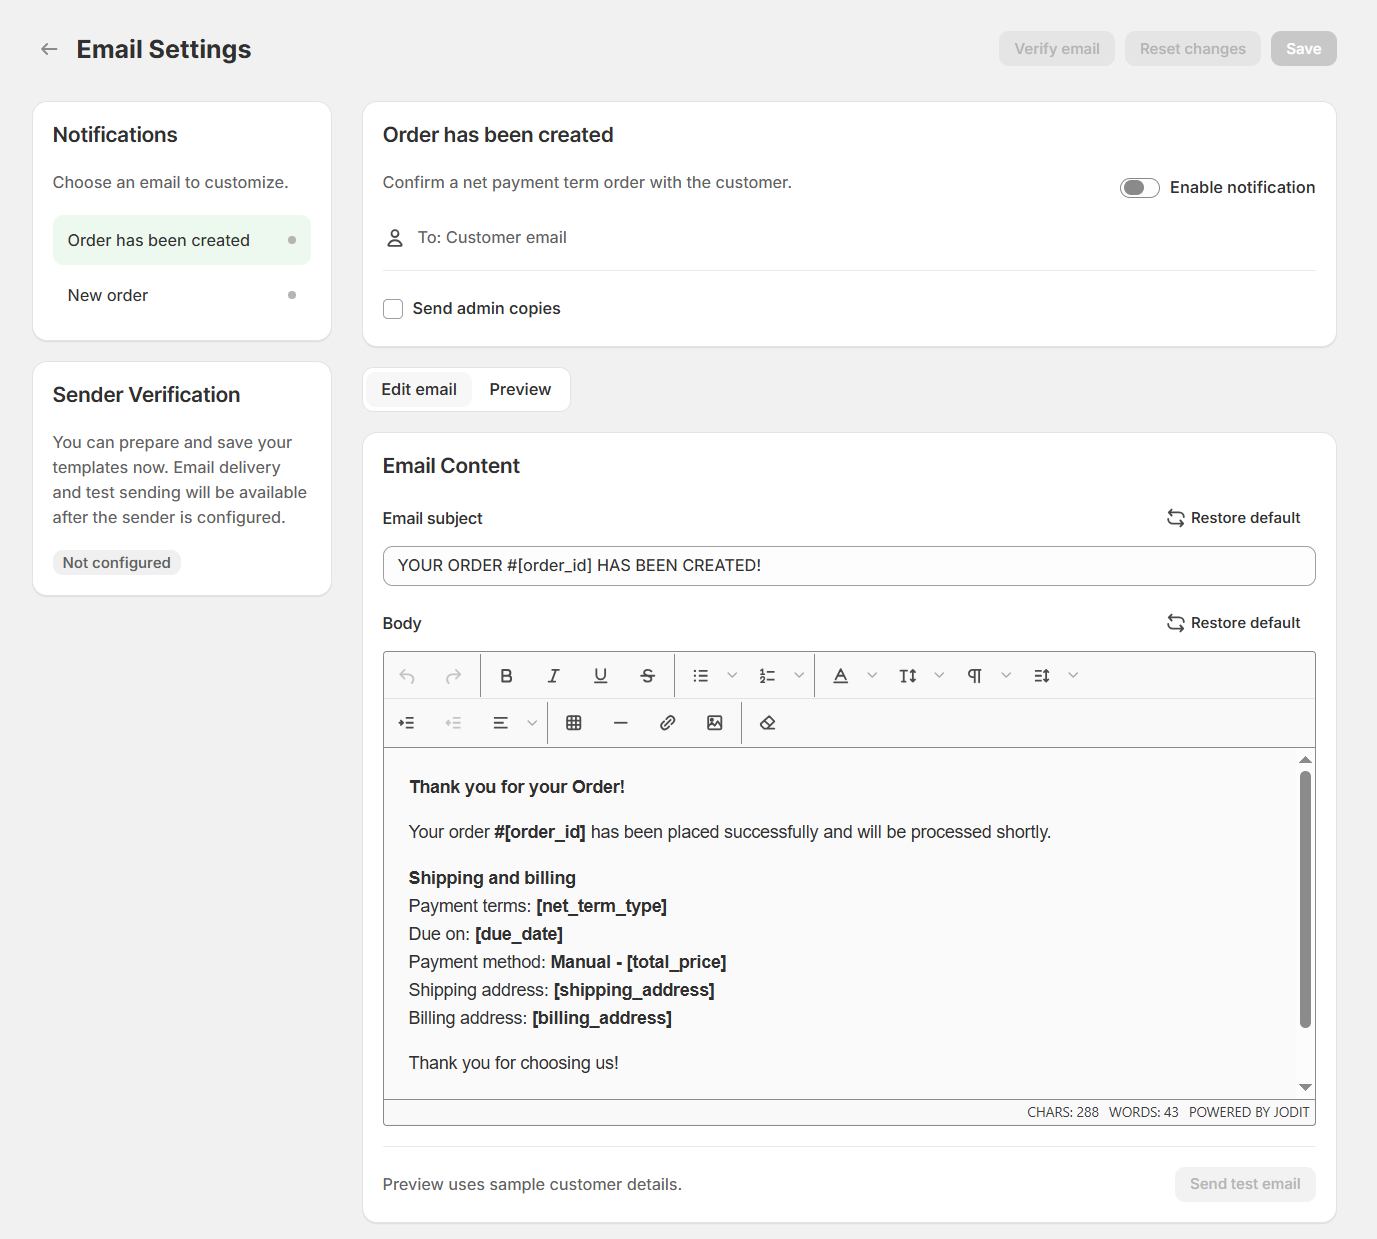
Under Notifications, select the email you want to customize: Order has been created or New order.
The example selects Order has been created, which confirms a net payment term order with the customer.
- Enable notification: turn the selected notification on or off.
- To: check the recipient shown for the selected notification. The example shows Customer email.
- Send admin copies: select this if you want admin copies of the customer confirmation.
3. Edit the email content
In Edit email, customize the Email subject and Body. Use the editor toolbar to format headings, paragraphs, lists, and links.
Use email variables
Email variables are placeholders that Lumi automatically replaces with the relevant details for each email.
In the Email Variables panel, use Search variables to find the detail you need. Click Insert to add it to the body, or Copy to paste it into the subject. Keep the variable’s spelling and square brackets unchanged.
Use Restore default beside the subject or body to return that field to its default content.
Preview the email
Open Preview to review the email using sample customer details.
Choose your sender domain
By default, emails use Lumi’s sender address, [email protected]. You do not need to configure your own domain to use this default sender.
To send from your own domain, configure and verify it as your custom sender clicking the Verify email button.
4. Save your settings
Click Save to keep your changes. Reset changes discards unsaved edits.
Select the other notification to customize its content and settings as needed.